Step 1: Login to the Aura Connect portal and navigate to 'Telephony' > 'Numbers' in the lefthand toolbar.
Step 2: Click the pencil icon on the number you wish to assign the relevant trunk to:

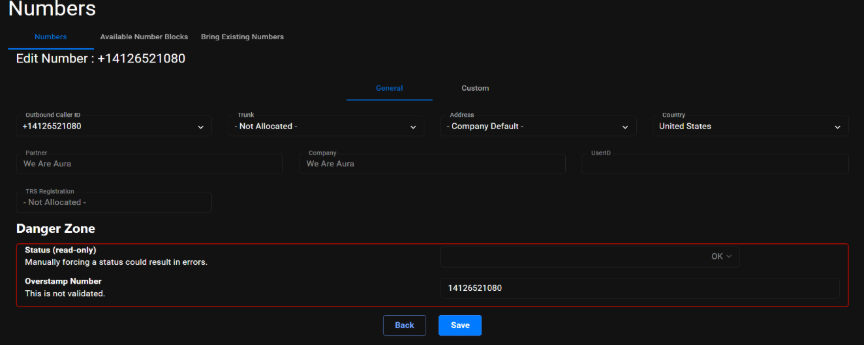
Step 3: Select the trunk you wish to assign from the ‘Trunk’ drop down then click 'Save:'
Step 4: The number you have updated will show as pending update (this can take around 5 minutes):

Step 5: Once the number has updated the status will show as ‘OK’ and the relevant trunk is now assigned. It can then be allocated to the relevant user:

Step 6: To allocate to the relevant user, navigate back to the lefthand toolbar, and locate 'Accounts' > 'Users.' Then use the same pencil icon to make changes. This, too, may take a minute or two to update, after which the status button will be green.